← MicroPython on Raspberry Pi Pico
Lesson 2
Writing and running code with ViperIDE
Connect your Pico to ViperIDE and write your first MicroPython programs — no software to install, no admin rights needed.
Your Pico is flashed with MicroPython and ready to go. Now you need a way to actually write code and send it to the board. That’s ViperIDE: it runs entirely in your browser, talks to your Pico over USB using a feature called WebSerial, and needs nothing installed on the computer. That matters in a lab full of Chromebooks and locked-down Macs where you can’t install anything anyway.
Go to viper-ide.org in Chrome or another Chromium-based browser (WebSerial doesn’t work in Safari or Firefox yet). You don’t need an account.
Connecting your Pico
Plug your Pico into your computer with a micro USB cable. In ViperIDE, look for the option to connect over USB/serial. Your browser will show a list of devices — pick the one that matches your Pico (it may show up as something like “USB Serial Device”). The first time, your browser will ask permission to talk to the device; allow it.
Once connected, you should see your Pico’s files in ViperIDE’s file manager, even if that list is empty right now.
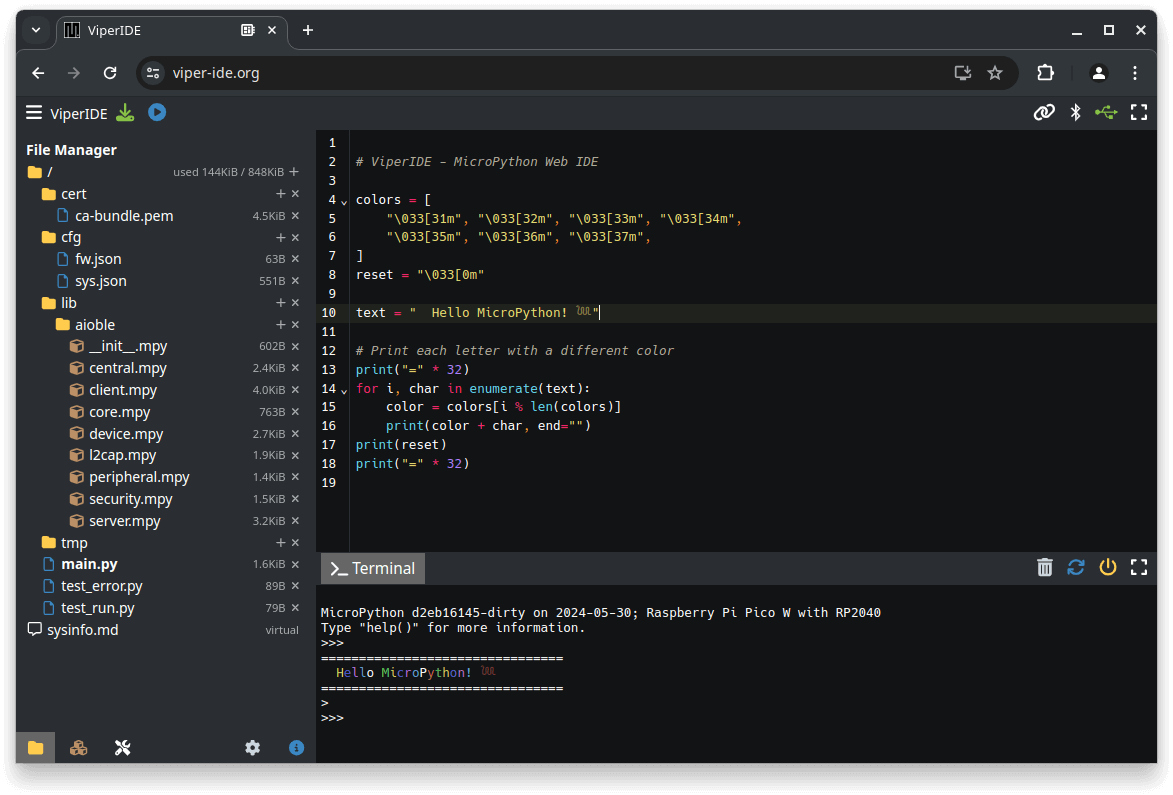
Screenshot: ViperIDE by Volodymyr Shymanskyy, MIT License.
Two ways to run code: the REPL and script files
ViperIDE gives you two different places to write code, and they behave differently.
The REPL (read-eval-print loop) is a live prompt connected directly to your Pico. Anything you type runs immediately, one line at a time, and nothing you type there is saved. It’s great for quick experiments and checking what a line of code actually does.
The editor is where you write a real program: multiple lines, saved as
a file on your Pico (usually main.py, which runs automatically every
time your Pico powers on). This is where your actual projects will live.
Your first program: Hello, World!
Click into the REPL and type:
print("Hello, world!")
Press Enter. Your Pico should immediately print the message back. That
print() function is how your program talks to you — you’ll use it
constantly, especially for figuring out what’s going wrong when something
doesn’t work.
Now try the editor instead. Create a new file, type the same line, and
save it to your Pico as main.py:
print("Hello, world!")
Click the blue ▶ (play) button near the ViperIDE logo, or press
F5. You should see the same output — but this time, the code stays on
your Pico. Unplug it, plug it back in, and it’ll print the message again
on its own, because main.py runs automatically on startup.
Loops and indentation
Typing the same print() line five times would work, but it’s tedious —
and if you wanted to change the message, you’d have to change it in five
places. A loop does the repetition for you:
for count in range(5):
    print("Message number", count)
Run that in the editor. You should see five lines of output, numbered 0 through 4 — not 1 through 5. MicroPython, like most programming languages, starts counting from zero.
Notice the indentation: the print() line is indented under the for
line. That indentation isn’t just for readability — it’s how MicroPython
knows which lines belong inside the loop. Everything indented the same
amount right after the for line runs once per loop; anything back at the
left margin runs only once, after the loop finishes.
Variables and conditionals
A variable stores a value so you can use it later, and change it:
favorite_number = 7

if favorite_number > 5:
    print("That's a big number!")
else:
    print("That's a small number!")
Run it, then change favorite_number to something less than 5 and run it
again. The if line asks a question — is favorite_number > 5? — and
MicroPython runs whichever indented block matches the answer.
You can chain more conditions with elif (“else if”):
favorite_number = 7

if favorite_number > 100:
    print("That's huge!")
elif favorite_number > 5:
    print("That's a big number!")
else:
    print("That's a small number!")
You now have the basic building blocks — printing, loops, variables, and conditionals — that every program in this pathway builds on. None of this needed your Pico’s hardware; you could have run all of it on ViperIDE’s Virtual Device. That changes starting next lesson, where these same building blocks start controlling real components.
Further reading
- ViperIDE — the tool itself
- How to write code for your Raspberry Pi Pico in your web browser with ViperIDE, Tom’s Hardware — a walkthrough of the same setup from a different angle